Advanced 3D printing software settings
Control every part of your printing process, and take your printing experience to the next level with these advanced features in REALvision Pro.
Control every part of your printing process, and take your printing experience to the next level with these advanced features in REALvision Pro.
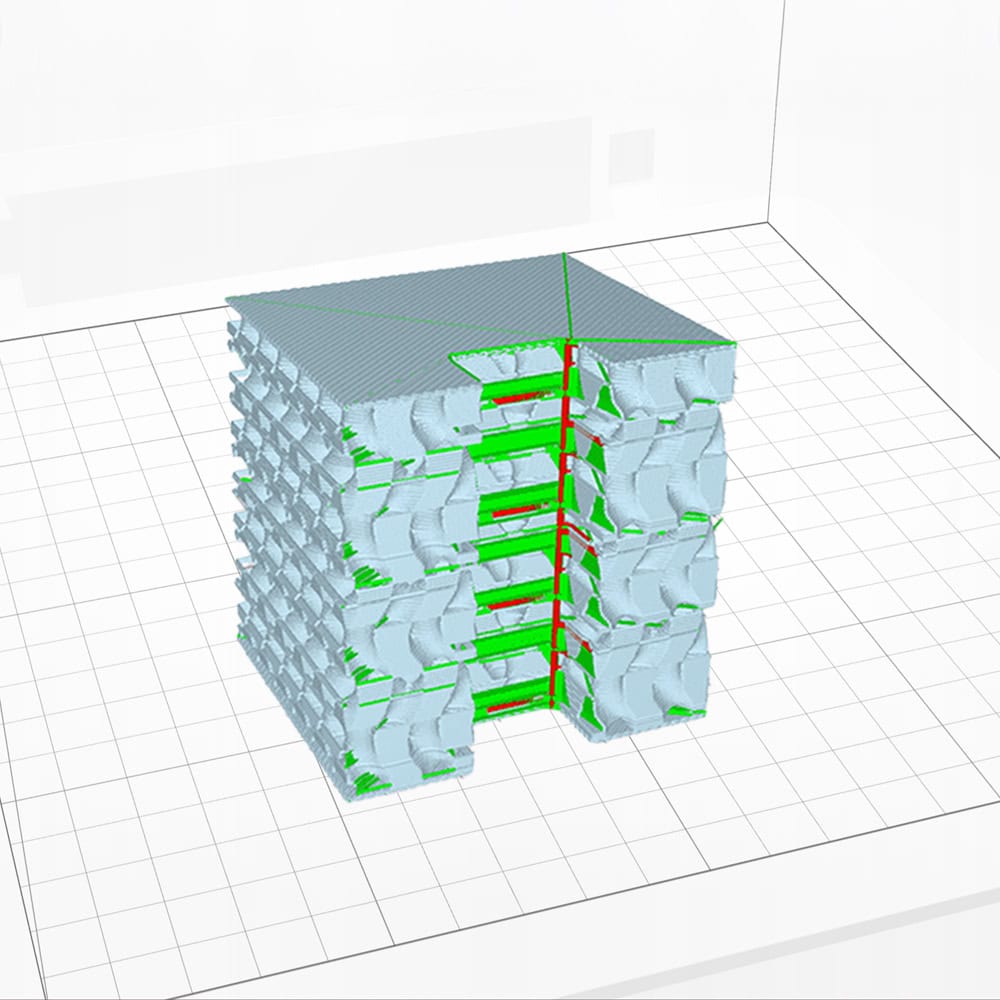
The Horizontal Modifier feature is an expert setting that enables manual optimization of print properties on specific layers, such as layer height, contour, flow factor, or printing speed. The feature can help you to:
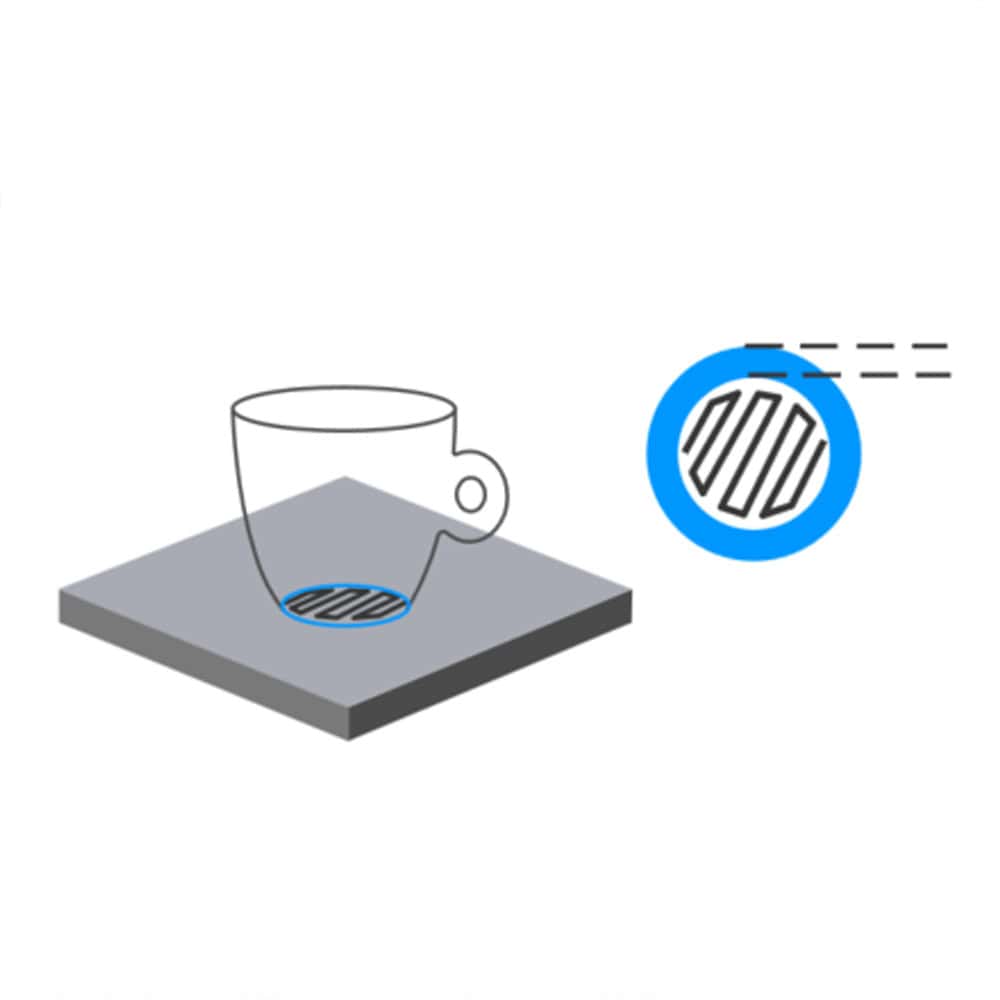
The Solid Infill Threshold feature is designed to enhance the strength of weak points on 3D-printed objects. By automatically identifying areas with less space than the specified threshold, this feature reinforces them with solid infill, which is especially useful for models with small parts that are sticking out and cannot be easily reinforced with regular infill types, resulting in higher-quality print output. With the Solid Infill Threshold feature, users can achieve greater strength and durability for their 3D-printed objects.
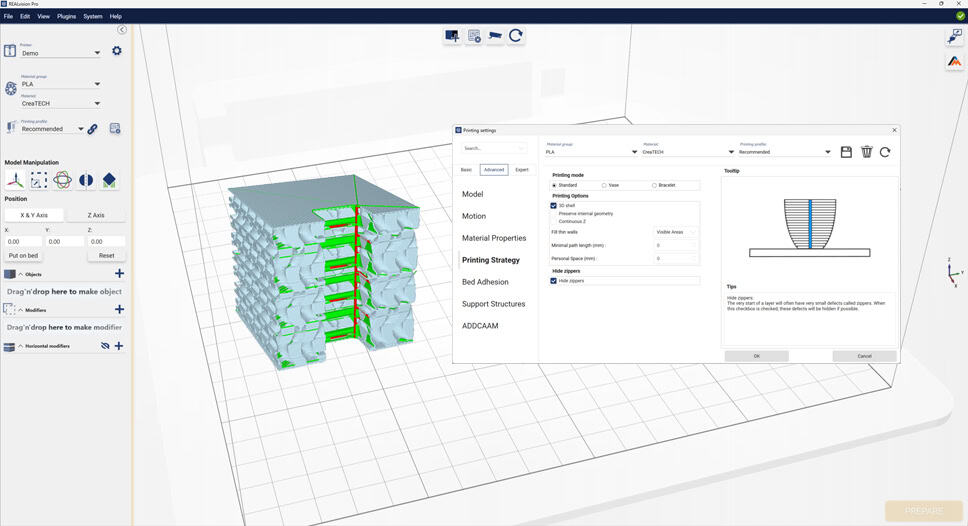
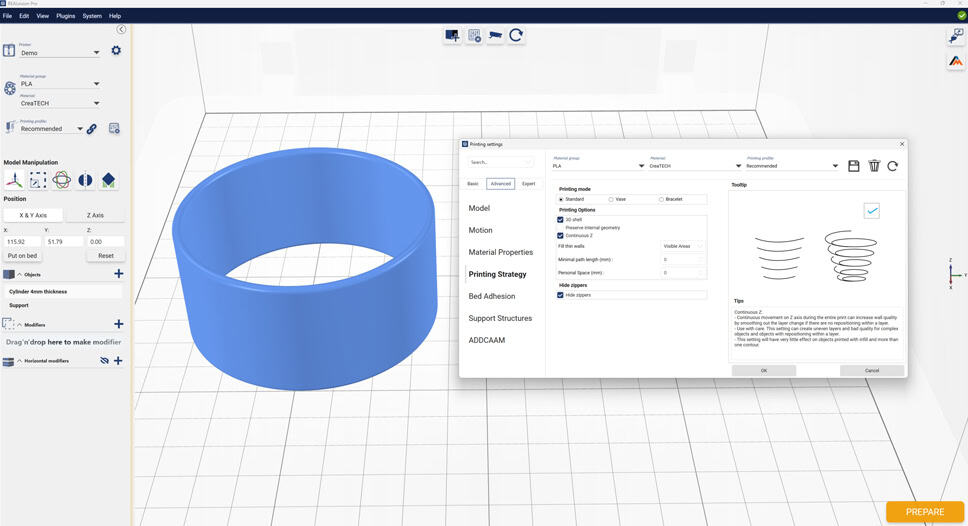
In 3D printing, a common visual imperfection is an appearance of a zipper, also known as a Zeam, which happens when an object is printed layer by layer, resulting in visible seams between each layer. To address this issue, REALvision Pro offers a setting that allows you to hide the zipper in the least noticeable areas of the printed object. By adjusting the slicer settings, the software will attempt to place all the zippers in convex or concave angles, or even on the back of the model, to minimize its visibility. While zippers do not affect the mechanical properties of a print, they can be a distraction for display models where aesthetics are essential. With REALvision Pro, you can achieve a more polished and professional finish for your 3D-printed objects.
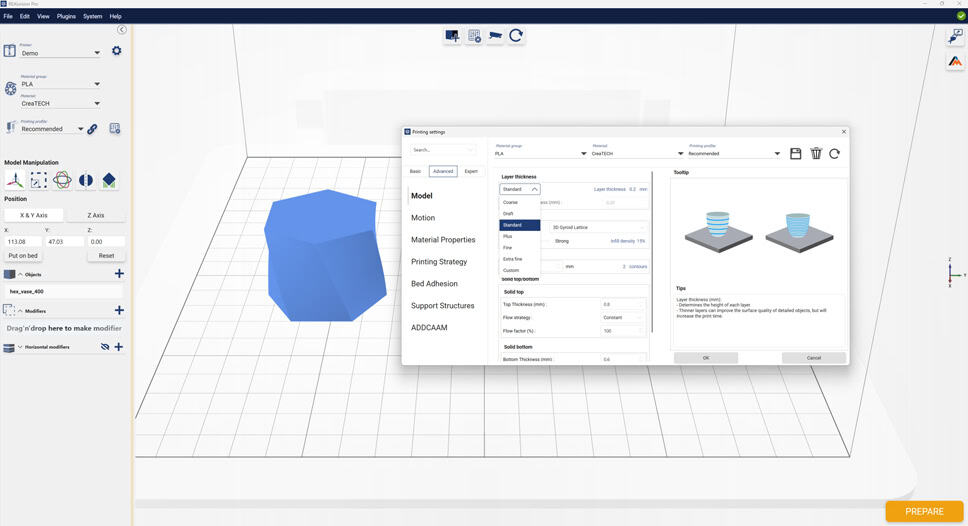
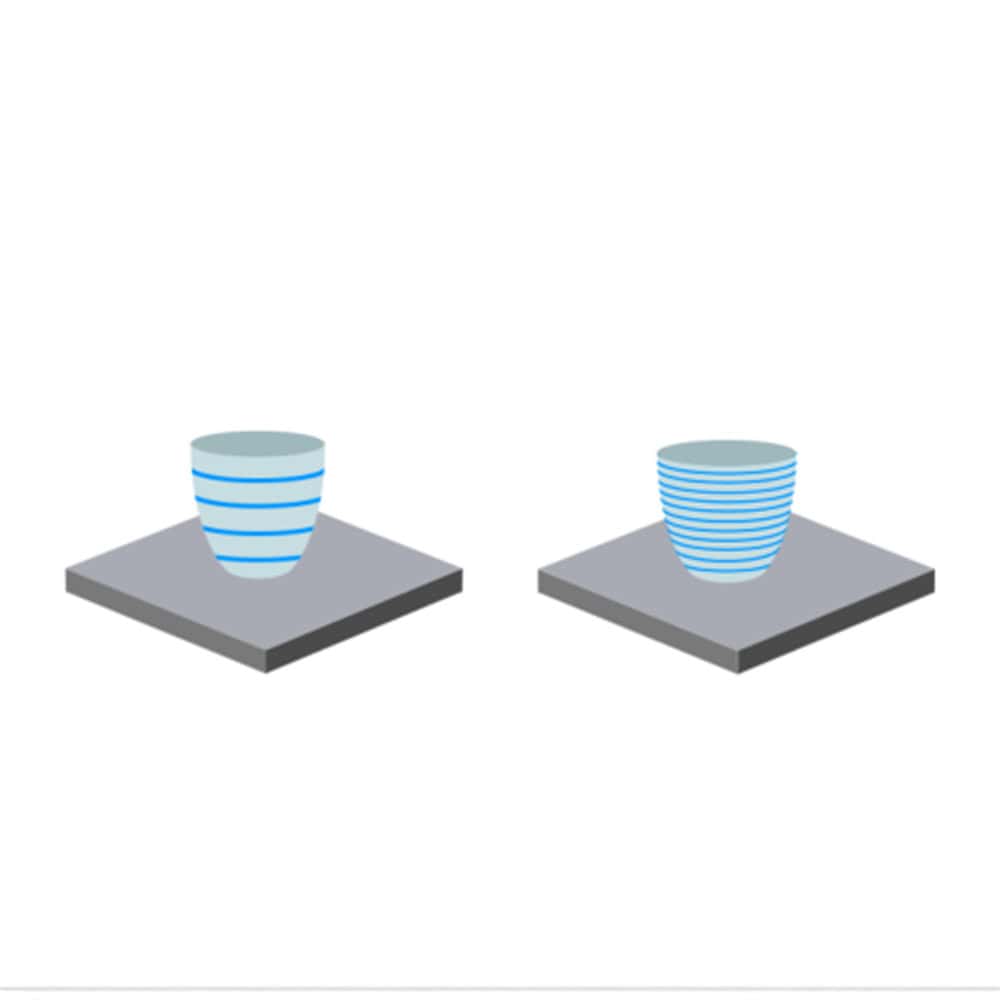
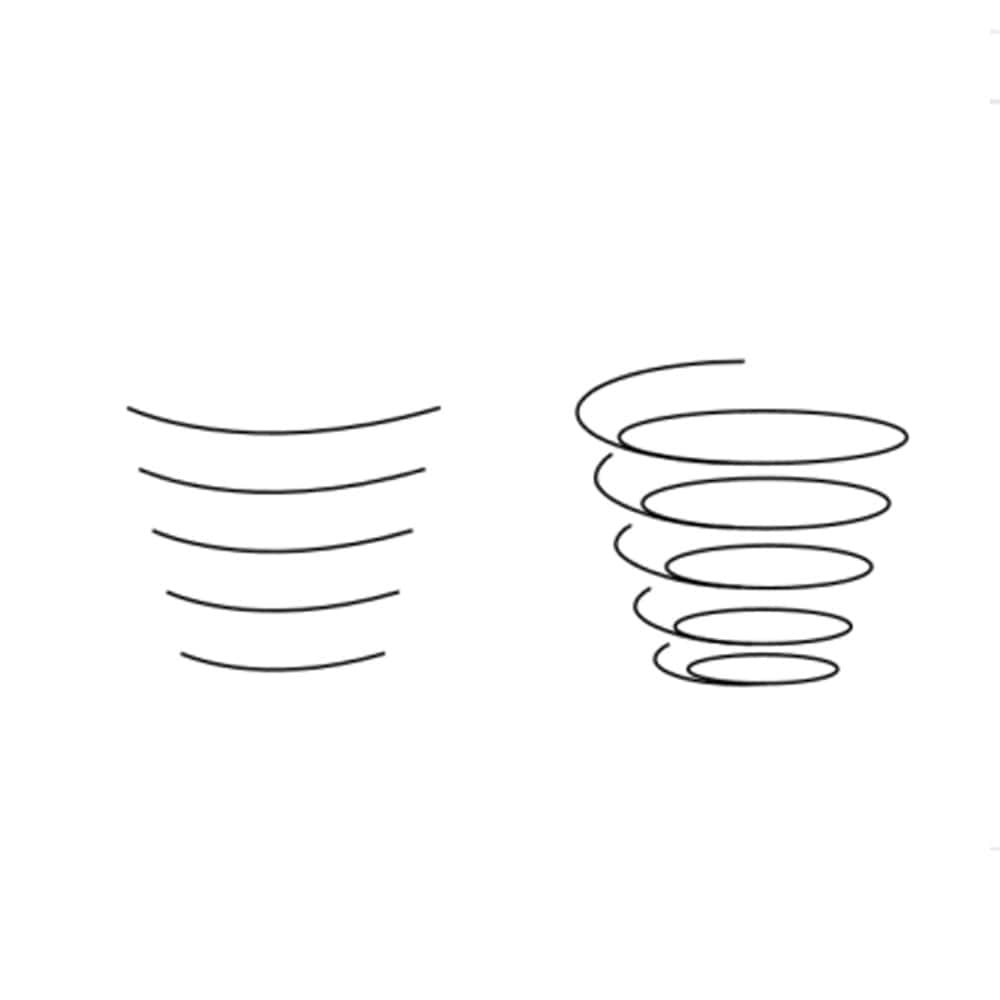
We are introducing the Adaptive Layer Height feature, which automatically optimizes layer height to strike the right balance between print quality and speed. Rather than using a static layer height throughout the print, the adaptive layer height feature adjusts the layer height to optimize printing based on the object’s geometry and other factors. This results in improved print accuracy, better details, and reduced print time. Whether you need smaller or larger layer heights, the adaptive layer height feature ensures you get the best print quality for your object.
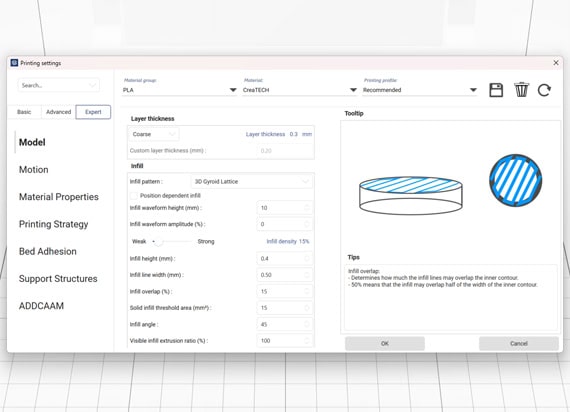
Finding specific settings can be a challenge for users in some slicers, but with REALvision Pro, it’s easy. Our built-in search bar in the settings menu lets you quickly locate the exact setting you need to modify to perfect your prints. Enter the name of the setting you’re looking for and edit the value accordingly. The changes are saved automatically, so you don’t need to worry about that. Additionally, with inbuilt tooltips, you can learn more about each setting and how to use it to take your 3D printing to the next level.
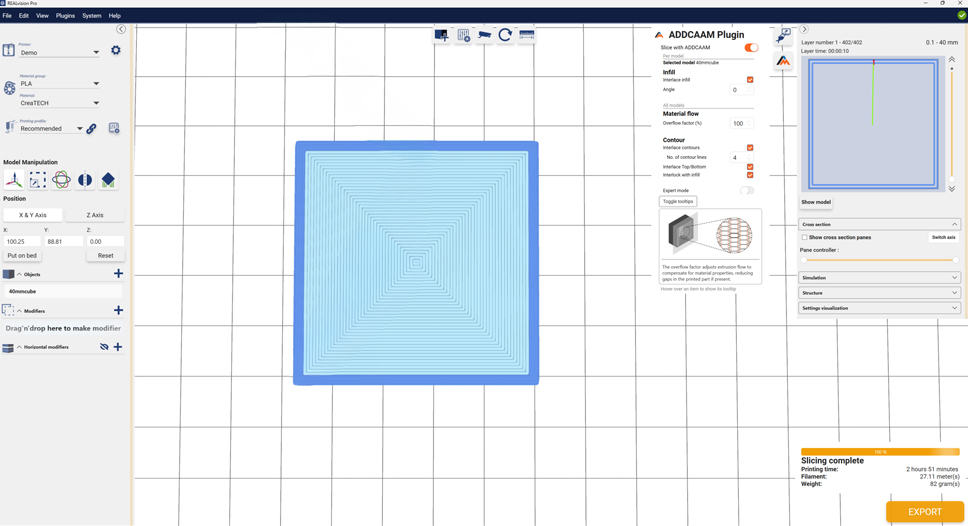
We offer a unique print mode called Continous Z, which is ideal for those looking to achieve a visually stunning finish on their 3D prints. With this feature, the printer will use a single, continuous print line to create the outermost surfaces of the object, resulting in a seamless and aesthetically pleasing print. This mode improves 3D print quality and reduces print time, making it an efficient choice for those seeking both quality and speed.
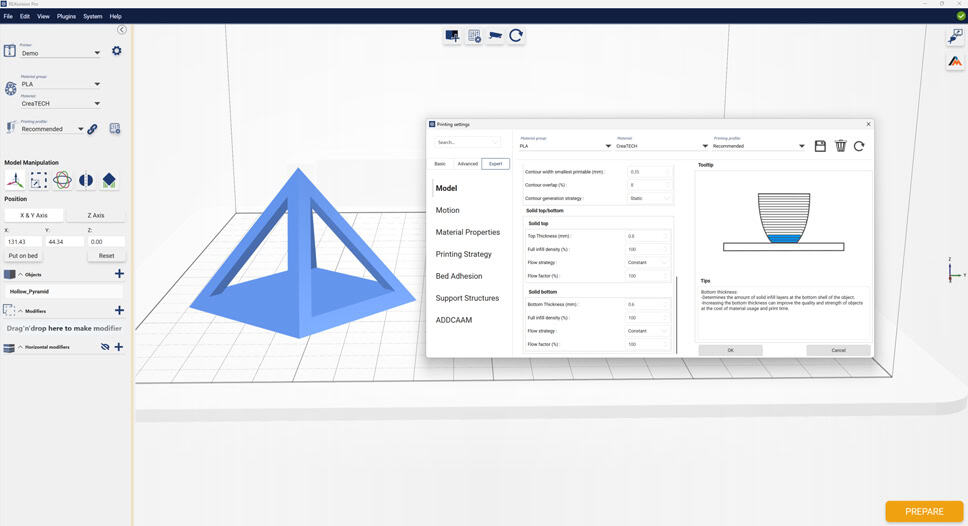
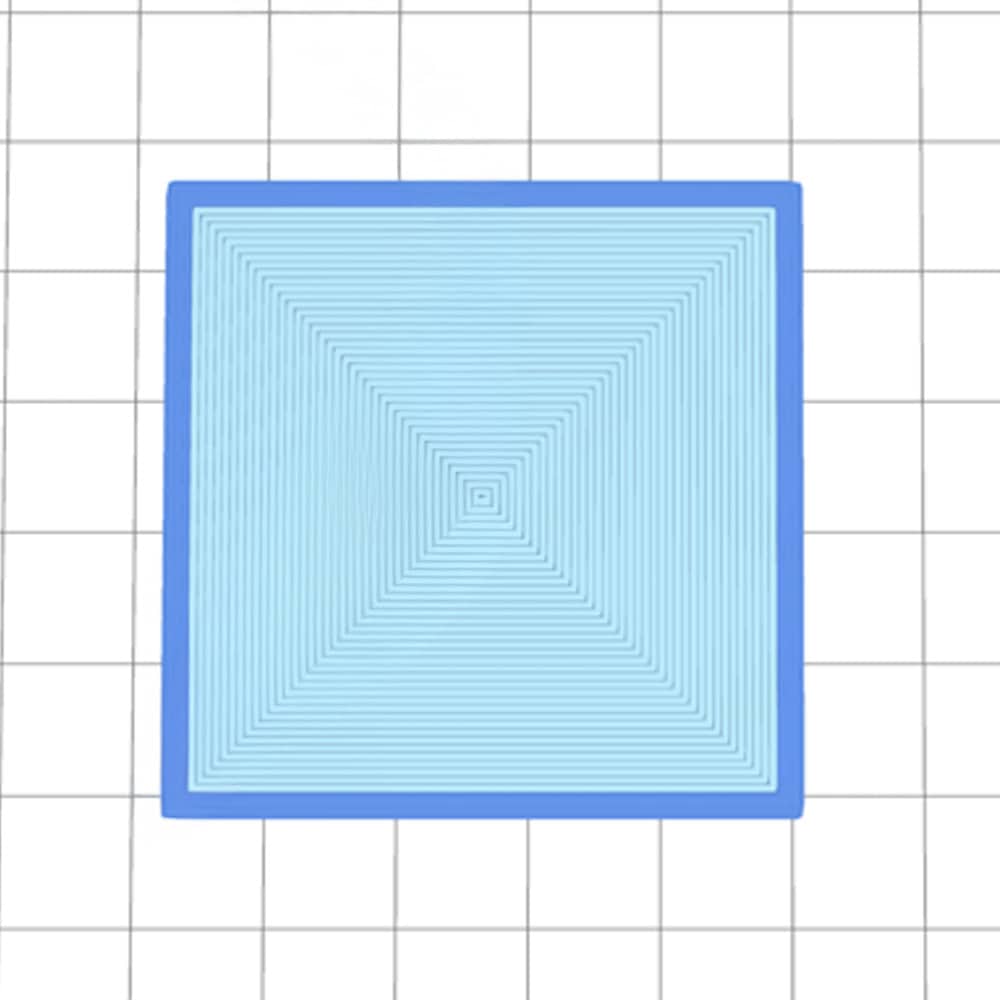
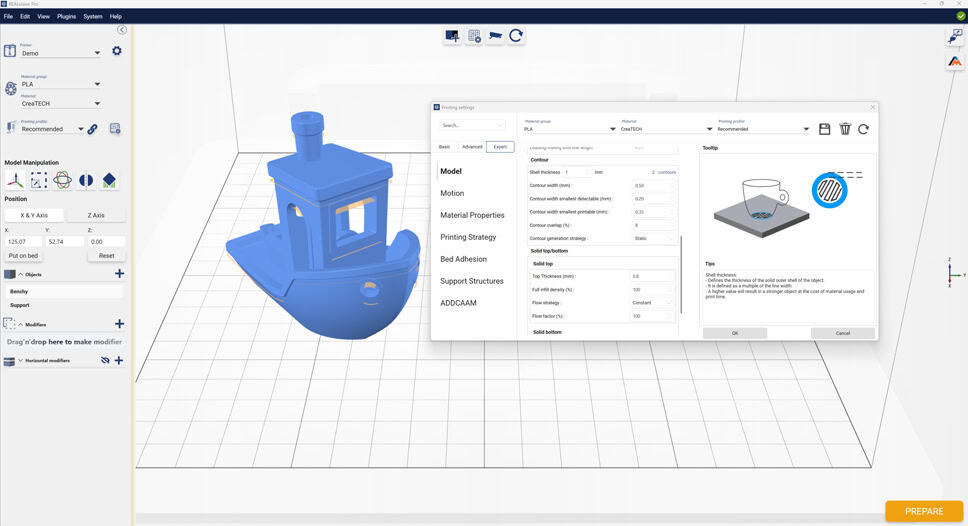
Improve the quality of the top surface of your prints while reducing material usage with the Top Layer/Bottom Layer feature in REALvision Pro. This feature dynamically increases the infill density at the top/bottom of your 3D prints, resulting in a smoother and more even top layer. The thickness and number of top and bottom layers can also be adjusted to achieve your print’s desired strength and finish. By using this feature, you can ensure that your 3D models have a high-quality surface with minimal material waste.
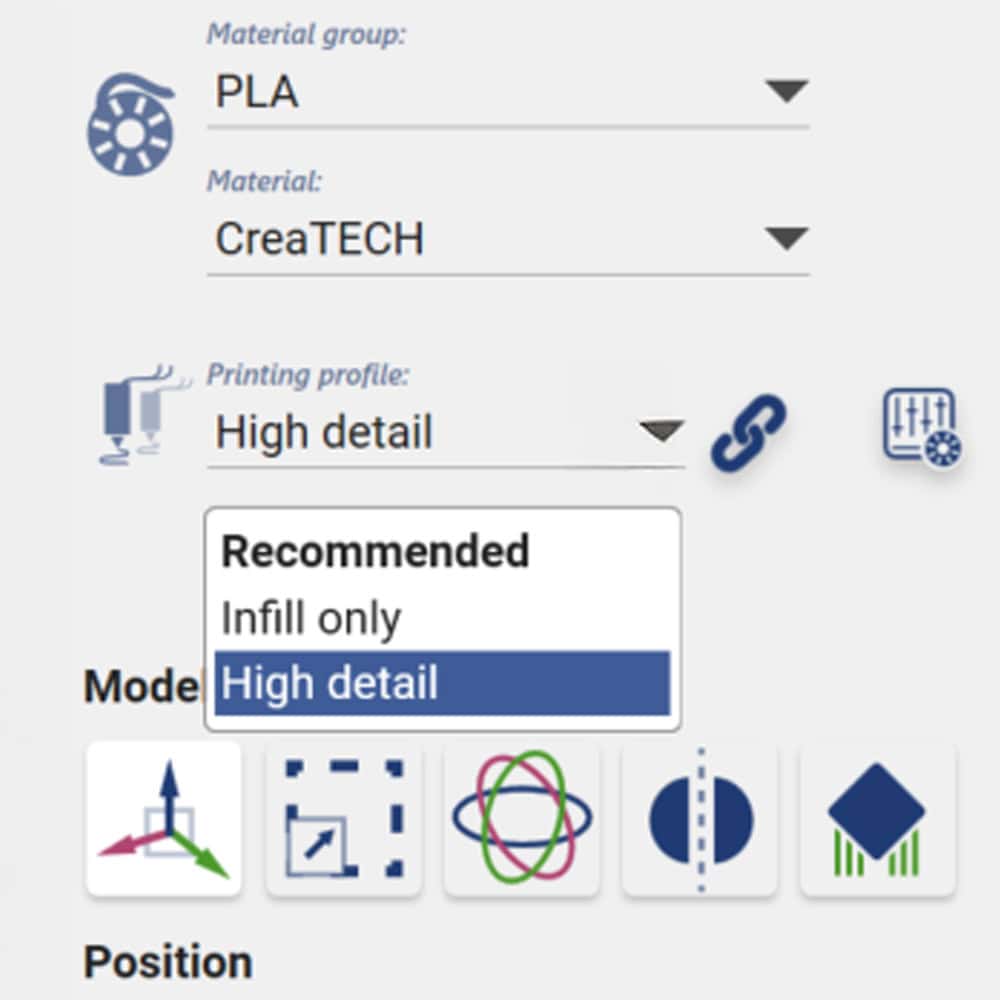
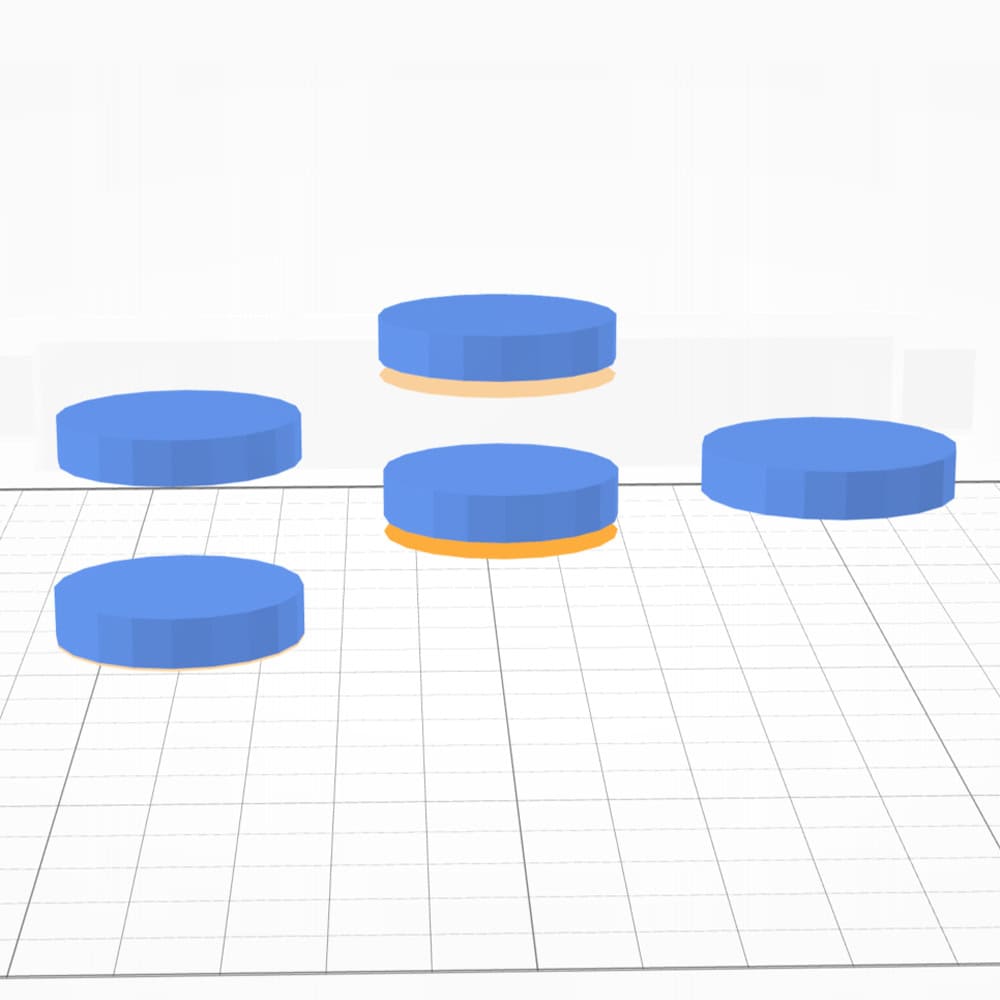
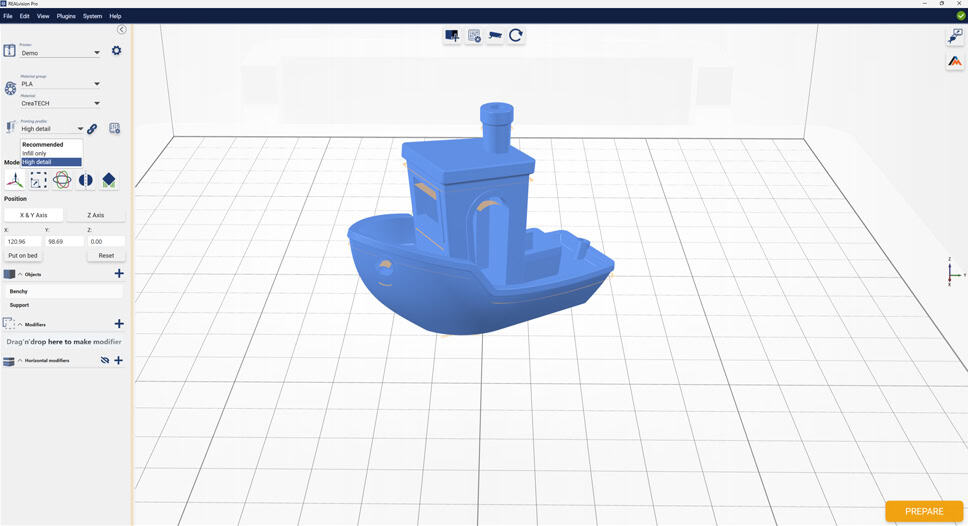
Consistency in 3D printing is essential for achieving high-quality prints. In REALvision Pro, selecting the appropriate configuration is made easy. You can specify settings and configurations that dictate how models are printed. With different 3D printers, materials, and models requiring various settings, finding the perfect balance can be a challenge. However, with REALvision Pro, you can ensure that the same settings are used every time you print a particular type of part, ensuring a consistent and reliable printing experience.
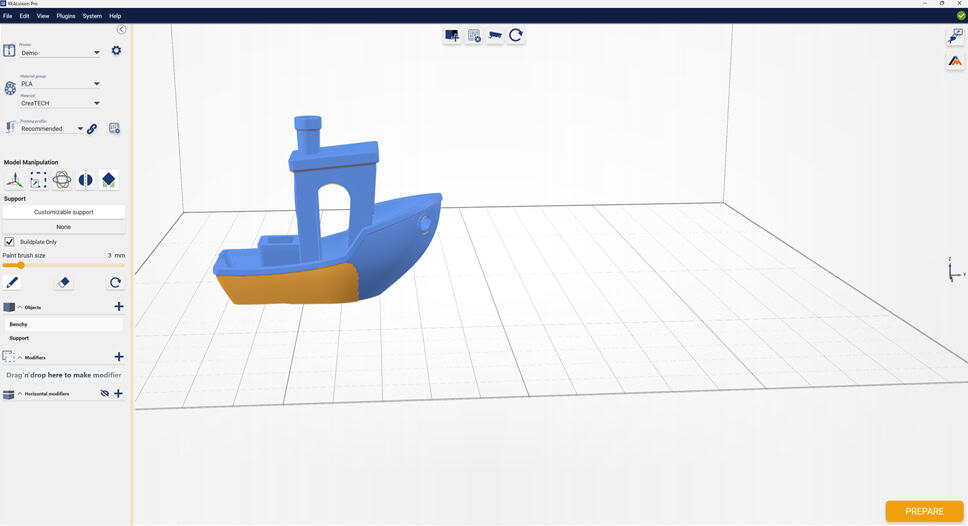
Utilize the Manual Support Generation feature in REALvision Pro to take complete control over your support structures. While automatic support generation is a valuable starting point, the ability to add, adjust, or remove support in specific areas of your model can significantly improve the overall quality of your print. The manual support generation feature is designed to be as simple as a paint-on and eraser solution, allowing you to easily modify support structures without affecting the rest of your model. Additionally, the 2D and 3D print viewer in REALvision Pro will enable you to preview and fine-tune your support modifications to ensure optimal print results.
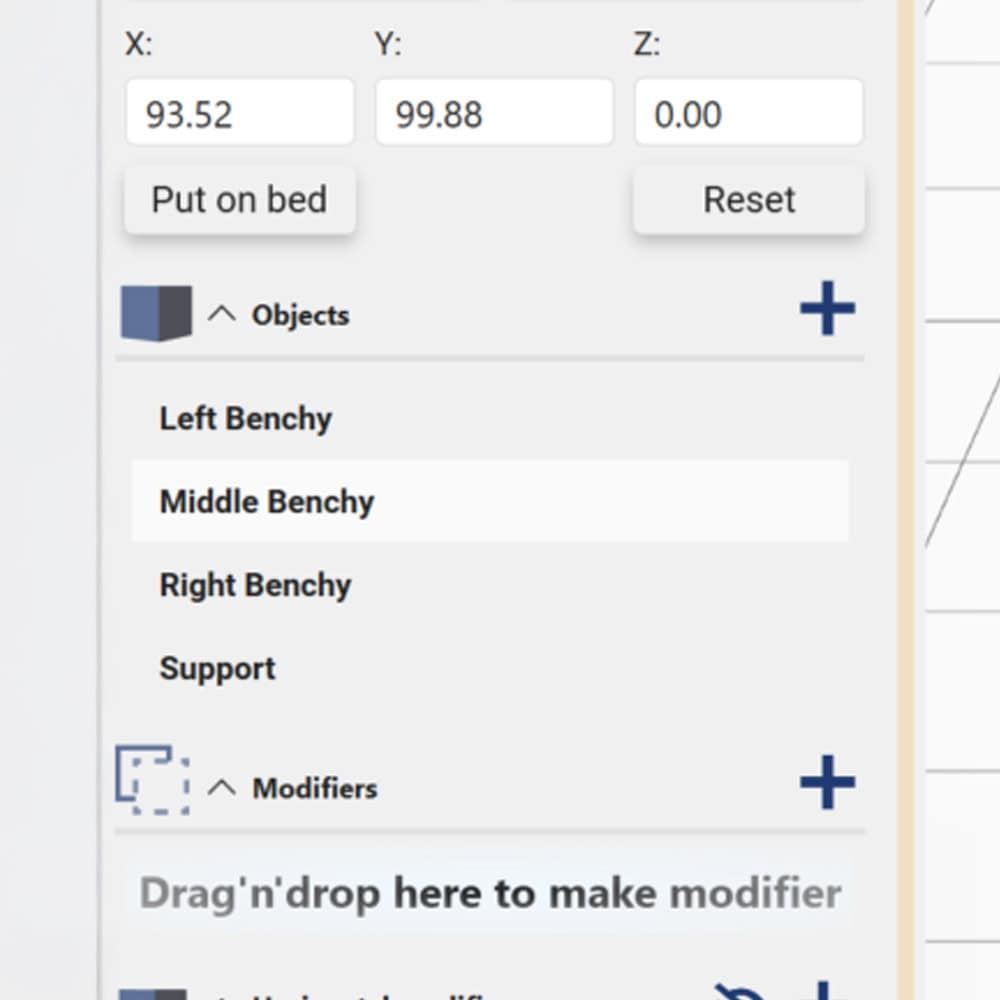
Employ the Rename models feature, and you to easily organize your models by renaming them in the model list. Often, models are exported from external editing software with default names, which can be confusing when working with multiple objects. You can quickly identify and locate the desired model by renaming models individually. This feature is handy when testing different filament profiles and settings. You can name the objects based on the settings they represent, allowing for a clear overview of your workspace and a streamlined workflow.
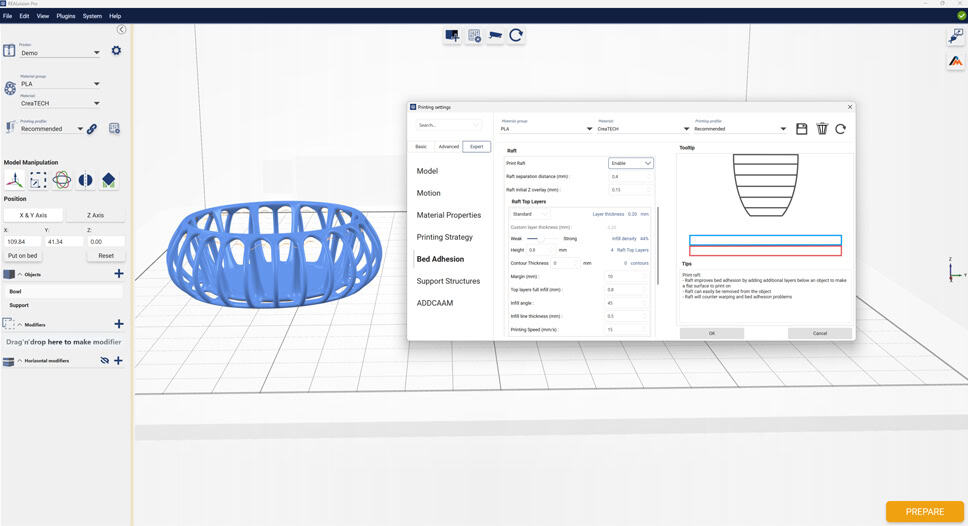
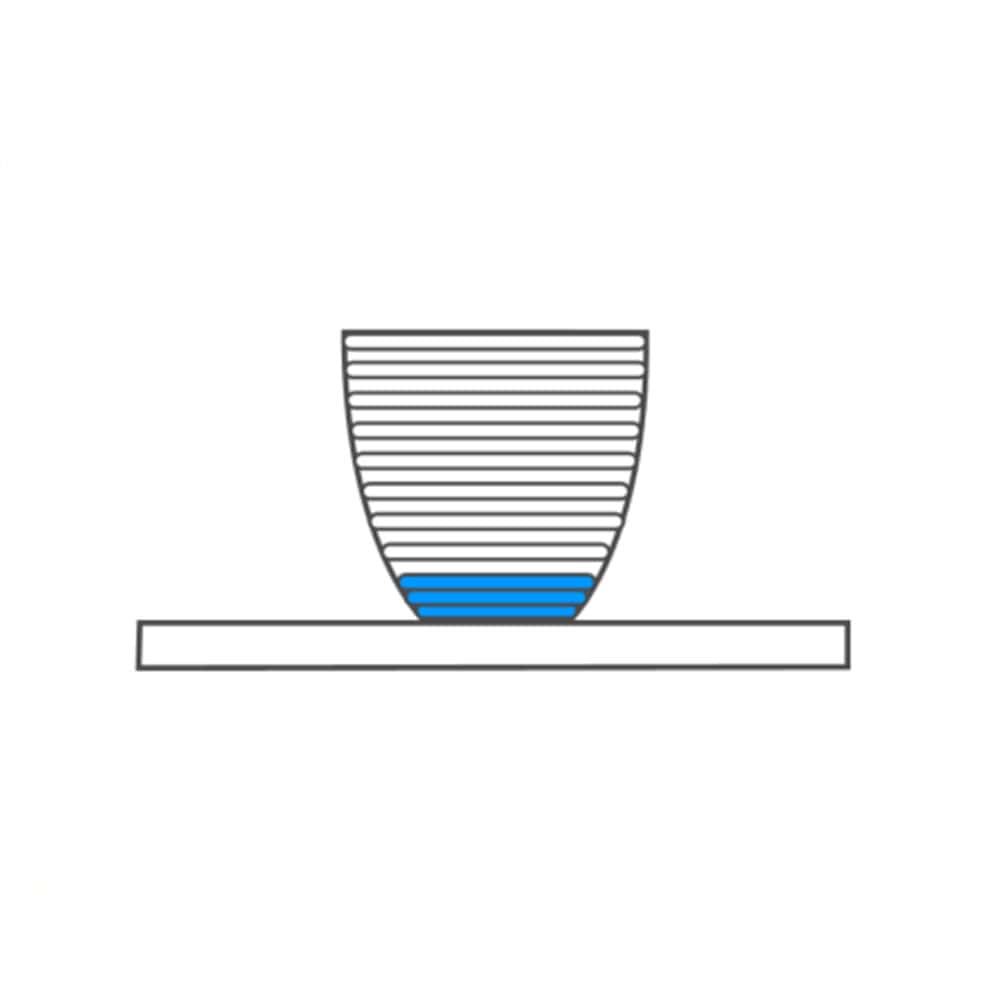
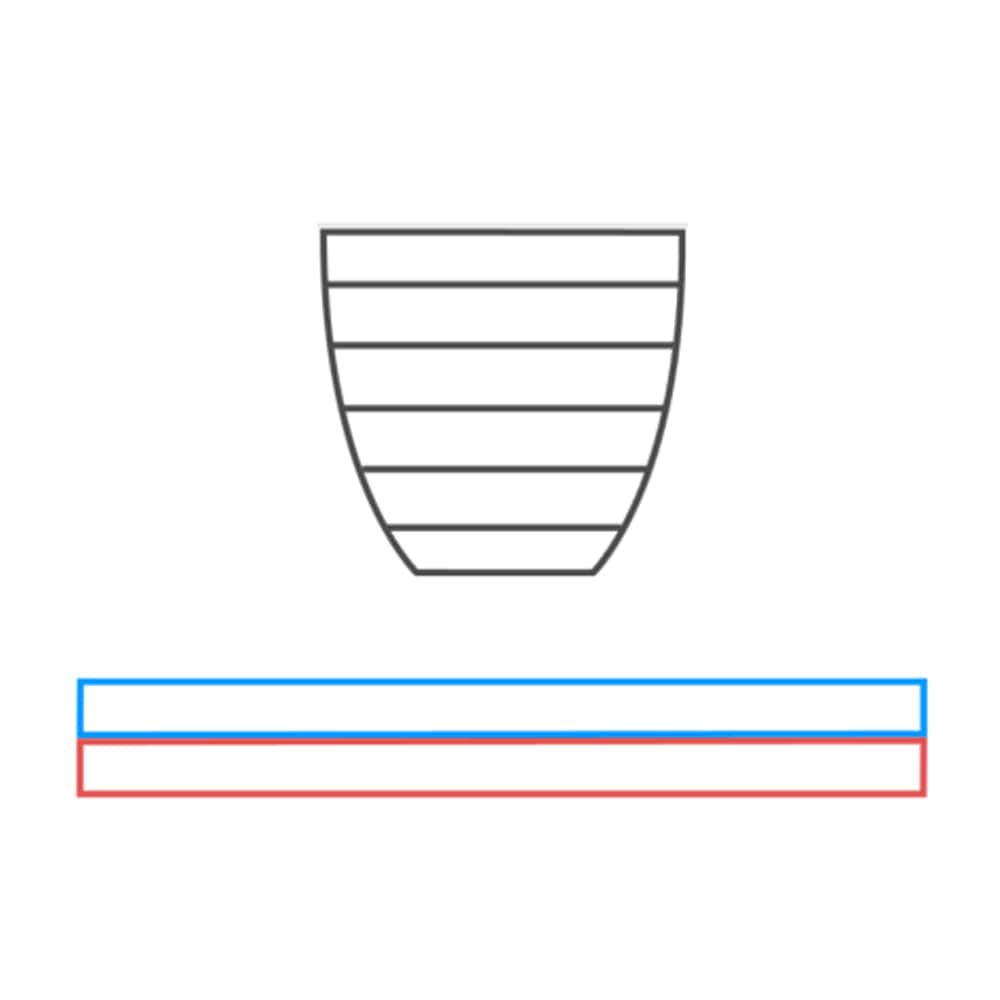
We offer a solution to warping or bed adhesion issues during 3D printing. By utilizing the Raft feature, you can ensure that the first printed layer is accurate and the print is firmly attached to the print bed. This feature can help relieve various challenges with 3D printing, such as warping, poor finish, and bed adhesion issues. A raft is a horizontal mesh of filament printed onto the printer’s build platform. The actual print and the first layer are then printed onto the raft, guaranteeing that the first layer is correct and the 3D print is securely grounded to the bed.
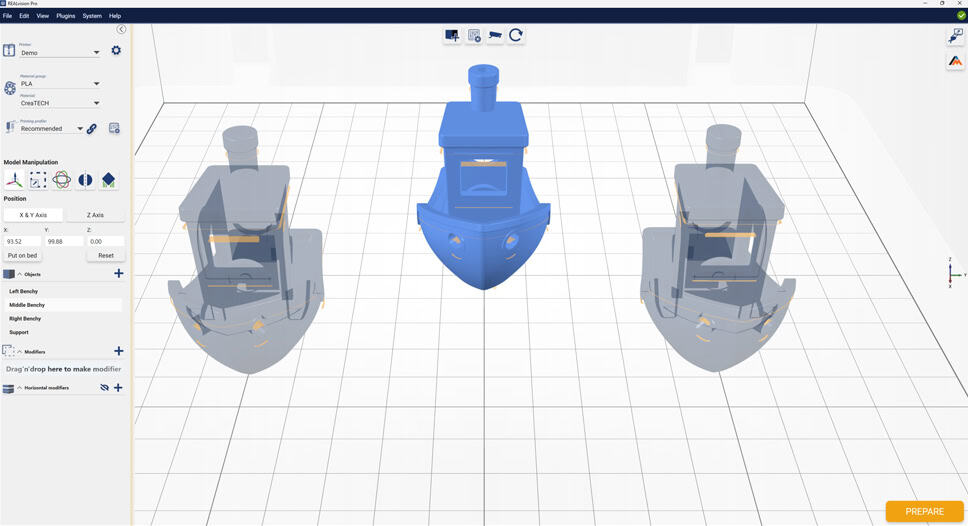
The feature allows for the deactivation of automatic placement. It enables you to import objects with their precise size and placement from their original CAD program, which is particularly useful if the user requires CNC postprocessing work, as accurate placement is crucial in this context.
The Split Flow Factor is a feature that helps you achieve even better quality prints. It divides the flow factor into visible and inner areas, allowing for more precise adjustments when printing with polyether (PEEK), carbon-reinforced, metallic, ceramic-loaded, or flexible materials. With this feature, you have control over the flow of your model’s visible and invisible areas. You can even create a flow-per-speed when working with special filaments, limiting the printer’s speed when printing visible parts of the model to maintain a high-quality exterior. Conversely, when speed is more important than quality, you can push the printer to its limits when printing the object’s interior. In short, the Split Flow Factor feature gives you greater control and flexibility when fine-tuning your prints.
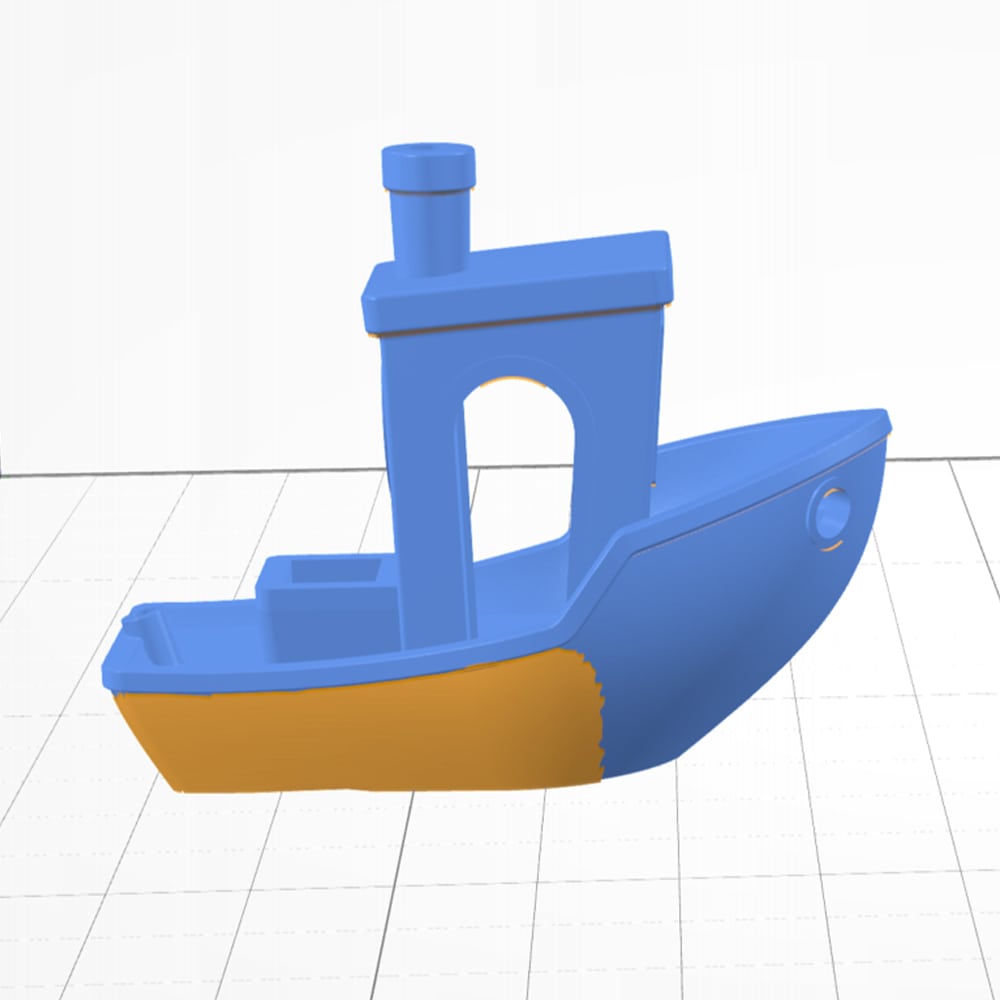
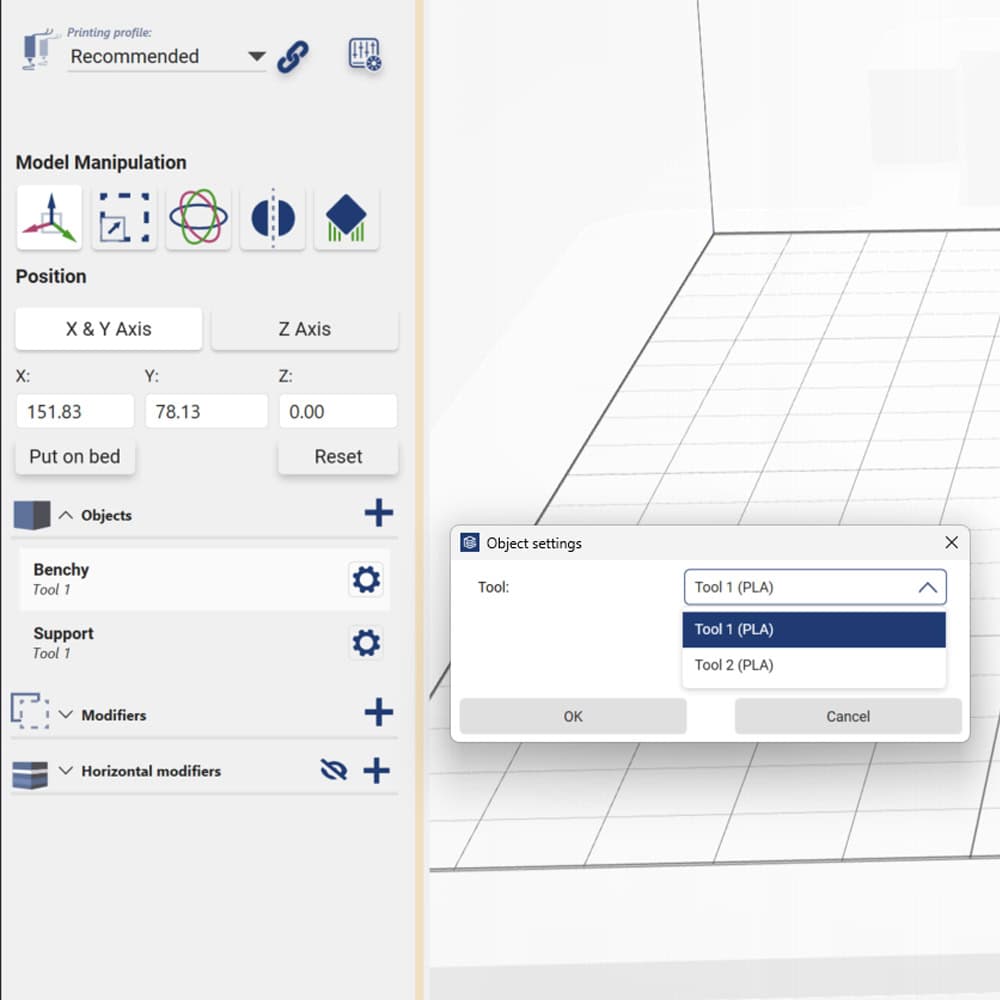
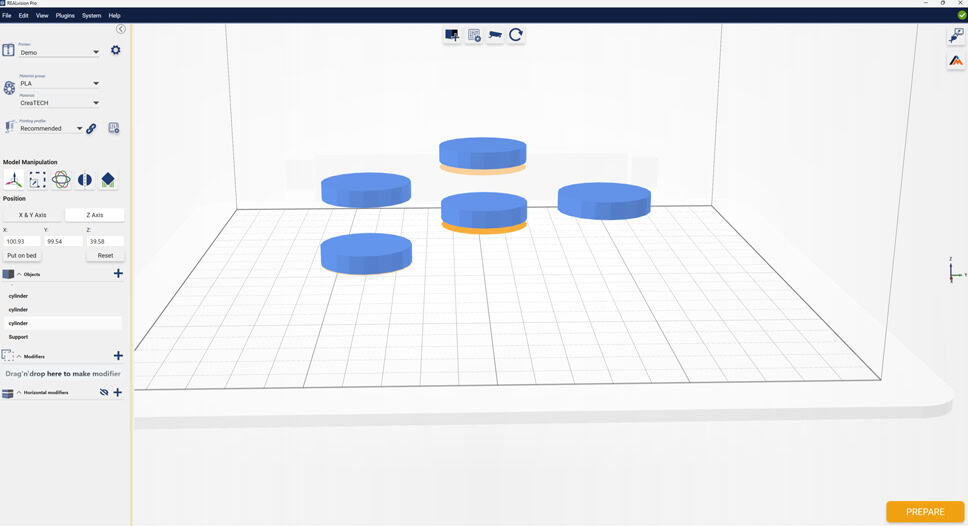
When you’re 3D printing, it’s essential to choose a specific support material to help keep your design stable while it’s being printed. With Dedicated Support Material, you can select the kind of support material you want. The support material is what the structure is printed from, and it’s meant to hold up any parts of your design that might hang over the edge during printing, which helps ensure that your final product doesn’t fall apart while it’s being made. Various support materials are available, each with different costs, ease of use, and overall quality. It’s crucial to choose the suitable support material for your specific project, whether you’re making a prototype or a finished product, as it can significantly impact the outcome.
REALvision Pro 3D printer software features smart limits in Machine, Material, and Quality settings. That helps you to stay inside the balanced triangle between speed, quality, and strength. Smart settings support the beginner in quickly getting great results without complicating the experience. The expert user can dig into the more than 150 settings to take full advantage of their equipment and hold complete control within smart limits.