Modifiers: Complete control of strength and hardness
The modifiers feature is another outstanding and easy-to-use component of REALvision Pro 3D printer software to control the inside of the 3D design. 3D printing is about transferring a 3D cad model’s shape and a part’s strength, hardness, and other physical properties from the 3d software to the printed piece. In REALvision Pro, you can enrich the model when you prepare it for print. Optimizing the inside of your 3D print will affect print time and the use of material, so it has the potential to save costs.
Optimizing the inside of your 3D print will affect print time and the use of material, so it has the potential to save costs. This article has already covered the different types of infills in REALvision Pro and what they are optimized for: “3D printing infill patterns to save time, material and money.”
It becomes mighty when you combine infills and densities, and apply them to specific regions of the 3D content that need enforcement. This means you can use the modifiers feature to fully control the internal areas of your 3D models and define infill properties freely. In other words, the modifiers in REALvision Pro allow you to use the geometry of one object to design an area in the stl file that will use different settings for printing compared to the rest.
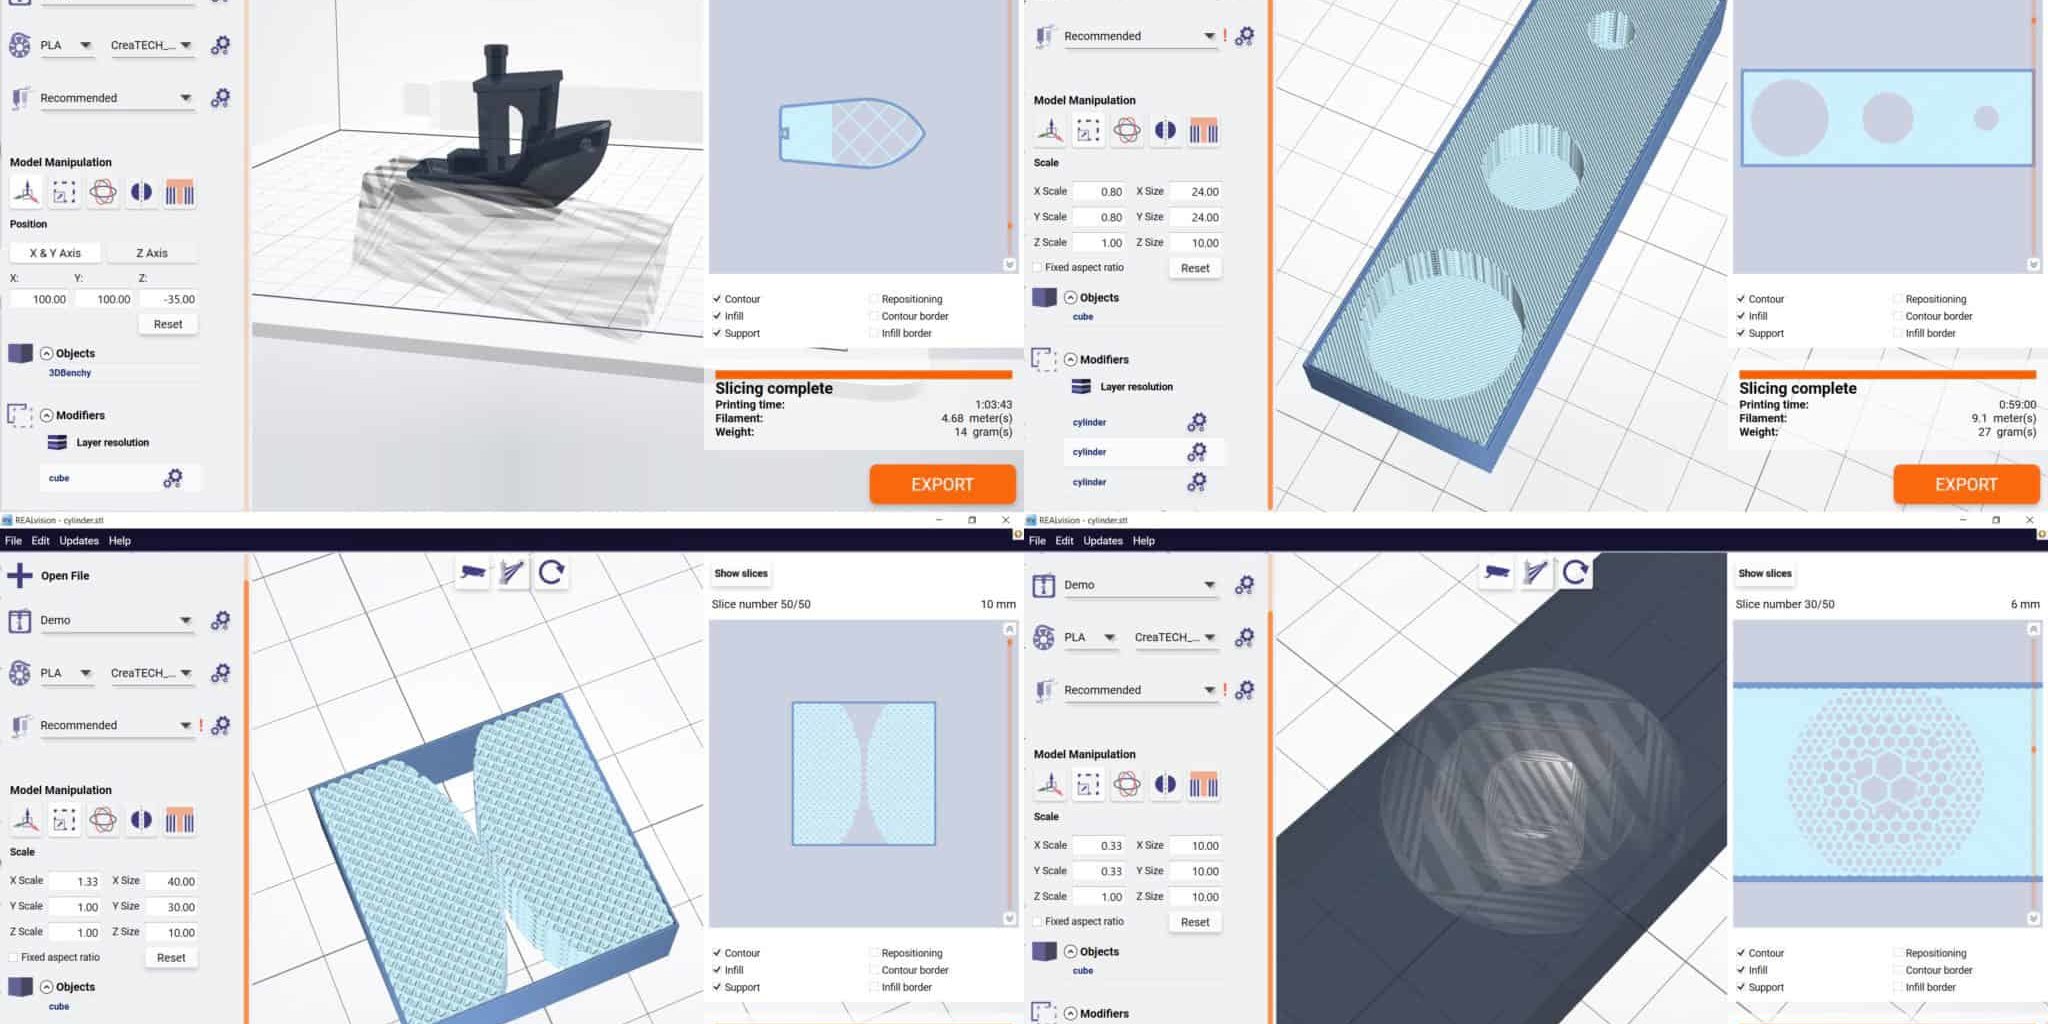
To visualize how the modifiers are used in your 3d objects, have a look at the following examples:
Change the balance or buoyancy using modifiers
We use this trick to make the 3DBenchy (The jolly 3D printing torture-test by CreativeTools.se) float. A cleverly placed infill modifier allows us to move the center of gravity further down and toward the stern.
Modifiers strategically reinforce or weaken areas
With modifiers, you can add a bit of extra material, where needed, or remove some and create flexible joints (living hinges).
Use modifiers creating internal cavities and structures
You can use a modifier with 0% infill to create cavities inside an object to affect its acoustic properties (3D printed musical instruments).
Create smooth transitions by overlapping regions
Modifiers can be overlapped with each other, in which case their order of priority goes from top to bottom on the list. With this functionality, you can create a smooth transition between different areas by placing a few concentric cylinders on each other.
Next step
Whether your 3D design software is Blender, Google Sketchup, Solidworks, Autocad, Inventor, or Tinkercad, or you get your free 3D models from Thingiverse – all it takes for our 3D printing software is an stl file. Load the 3D cad design in REALvision Pro and embrace the power of 3D printing technology.
We are here for you
Are you new to the printing process? Are you stuck in finding the right combination of filament, 3D tool, 3D printer, finishes, and toolsets? REALvision Pro is the only 3D printing software that supports your entire work process in a safe environment where you can ask business-sensitive questions. Your issues are not posted in an open forum, and your confidentialities are safe with us.
