Print quality troubleshooting guide
Improve the quality of your 3D-printed parts. A guide on how to fix the most common problems.
3D printer does not start
When trying to start a print the printer will try to heat up the bed or the printhead, but will not reach the target temperature.
Complete restart
This might sound basic but sometimes it helps so it is worth giving a try: turn the 3D printer off, unplug everything, and leave it for a few hours. After that, plug everything in, make sure the cables are connected properly and turn the 3D printer on. After this complete restart, the printer sometimes starts to operate normally.
Disable the heated print bed
As a temporary solution you can inactivate the bed heating. Uncheck the “Heated bed” checkbox in the Printing settings/Basic level/Material properties/Temperatures tab of REALvision and reprint. Note that this a short term solution when it is the bed that cannot reach the target temperature. Your printer should be brought in for maintenance if heating problems persist.
Printing settings in REALvision Pro
You can find the Printing Settings in REALvision Pro on the left panel as shown on the image on the left. The settings are available on three levels based on the users` experience with 3D printing: Basic, Advanced and Expert.
You can learn more in our Academy.
The nozzle is too close to the print bed
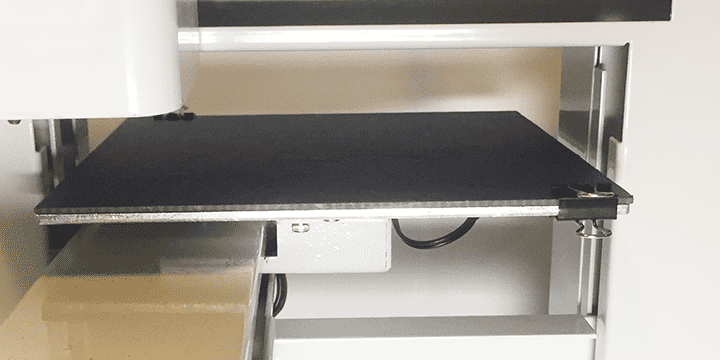
If the printer reaches the desired temperature but it doesn’t start to print the nozzle might be too close to the print bed, and there is not enough space for the material to come out. If this is the problem you will see that the printer will start to extrude after a few layers as the Z-axis changes and the bed lowers accordingly. You can adjust the print bed (Z-axis) in Printer settings/Bed leveling. The bed leveling method should be set to Automatically – if your printer supports it.
Problems with the SD card
It can happen that the SD card is the reason why the 3D printer is not able to start or print. It might have been corrupted and the 3D printer can’t access it.
Try to start the printer without an SD card, to see whether it works well in this case.
A software program to fit your needs
If you want to get quality prints without doing 3D modeling, consider adding REALvision Pro to your 3D printer kit. We promise you easy-to-use 3D slicing software in the high-end printing industry. Suppose you are:
- A picky hobbyist with a cheap desktop 3D printer.
- Running a 3D printing service with flawless 3D prints.
- 3D printing metal parts for aerospace.
- 3D printing customizable prosthetics, implants, or casts in ABS plastic (Acrylonitrile Butadiene Styrene).
- Rapid prototyping 3D models from design software.
- Need help with calibration or material profiles.
- Finding the best 3D printer for your application.
- Exploring manufacturing processes and technology to obtain zero-waste.
In that case, we have a software plan fitting your needs.
Did you know?
FDM printing comes from the abbreviation Fused Deposition Modeling and it is also known as Fused Filament Deposition (FFD) technology, and as Fused Filament Fabrication (FFF). The spool of filament is the material used to build the 3D part by melting the plastic out of the nozzle of the 3D printer. All 3D printing filament starts out in pellet form – small granules of plastic. The filaments can be made of different types of plastic. The most commonly used plastics are PLA which is Polylactic Acid and ABS which stands for Acrylonitrile Butadiene Styrene. Both materials have favorable mechanical properties, ABS is well known for its impact resistance, toughness, and rigidity, and is also commonly used in injection molding besides additive manufacturing. PLA is known for its low melting point, high strength, low thermal expansion, good layer adhesion, and high heat resistance. It has also become a popular material due to it being economically produced from renewable resources (bioplastics).
The printer extrudes this filament line by line, layer by layer, by increasing the z-axis, and will build the 3D printed part.
