3D printing infill patterns to save time, material and money
REALvision Pro features
Controlling the infill structure of objects is an advantage in 3D printing compared to traditional manufacturing. In this article, we take a deep dive into infill structures and the supported settings with a focus on how the right choice can save you time, material, and money and leave you with the requested end product.

Different infill structures
In 3D printing, infill has an important role in an object’s strength, structure, and weight. REALvisio Pro offers a wide range of possibilities to optimize the physical properties of the printed part.
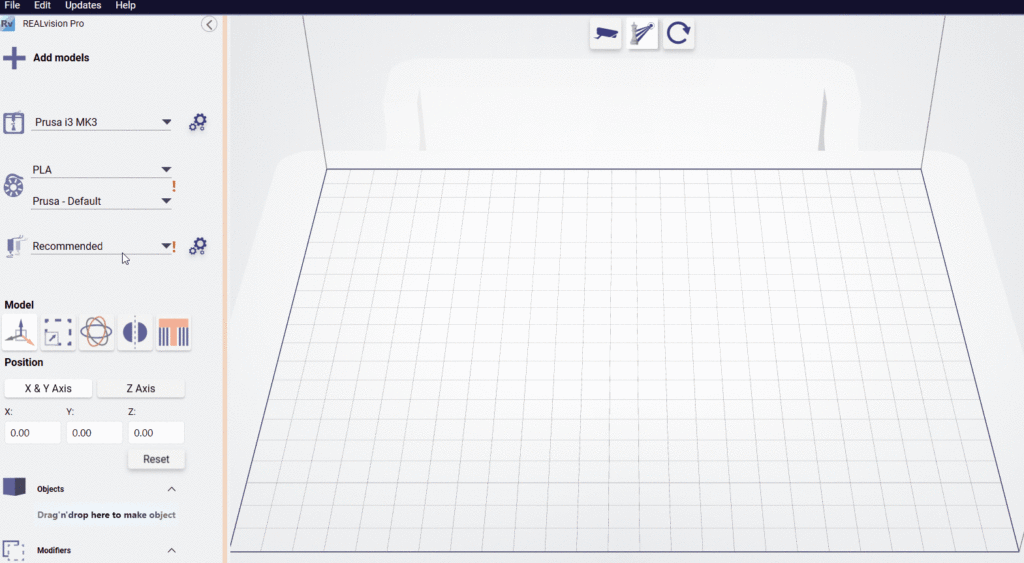
It is possible to set the infill pattern and use different lattice structures inside the print directly in the software.
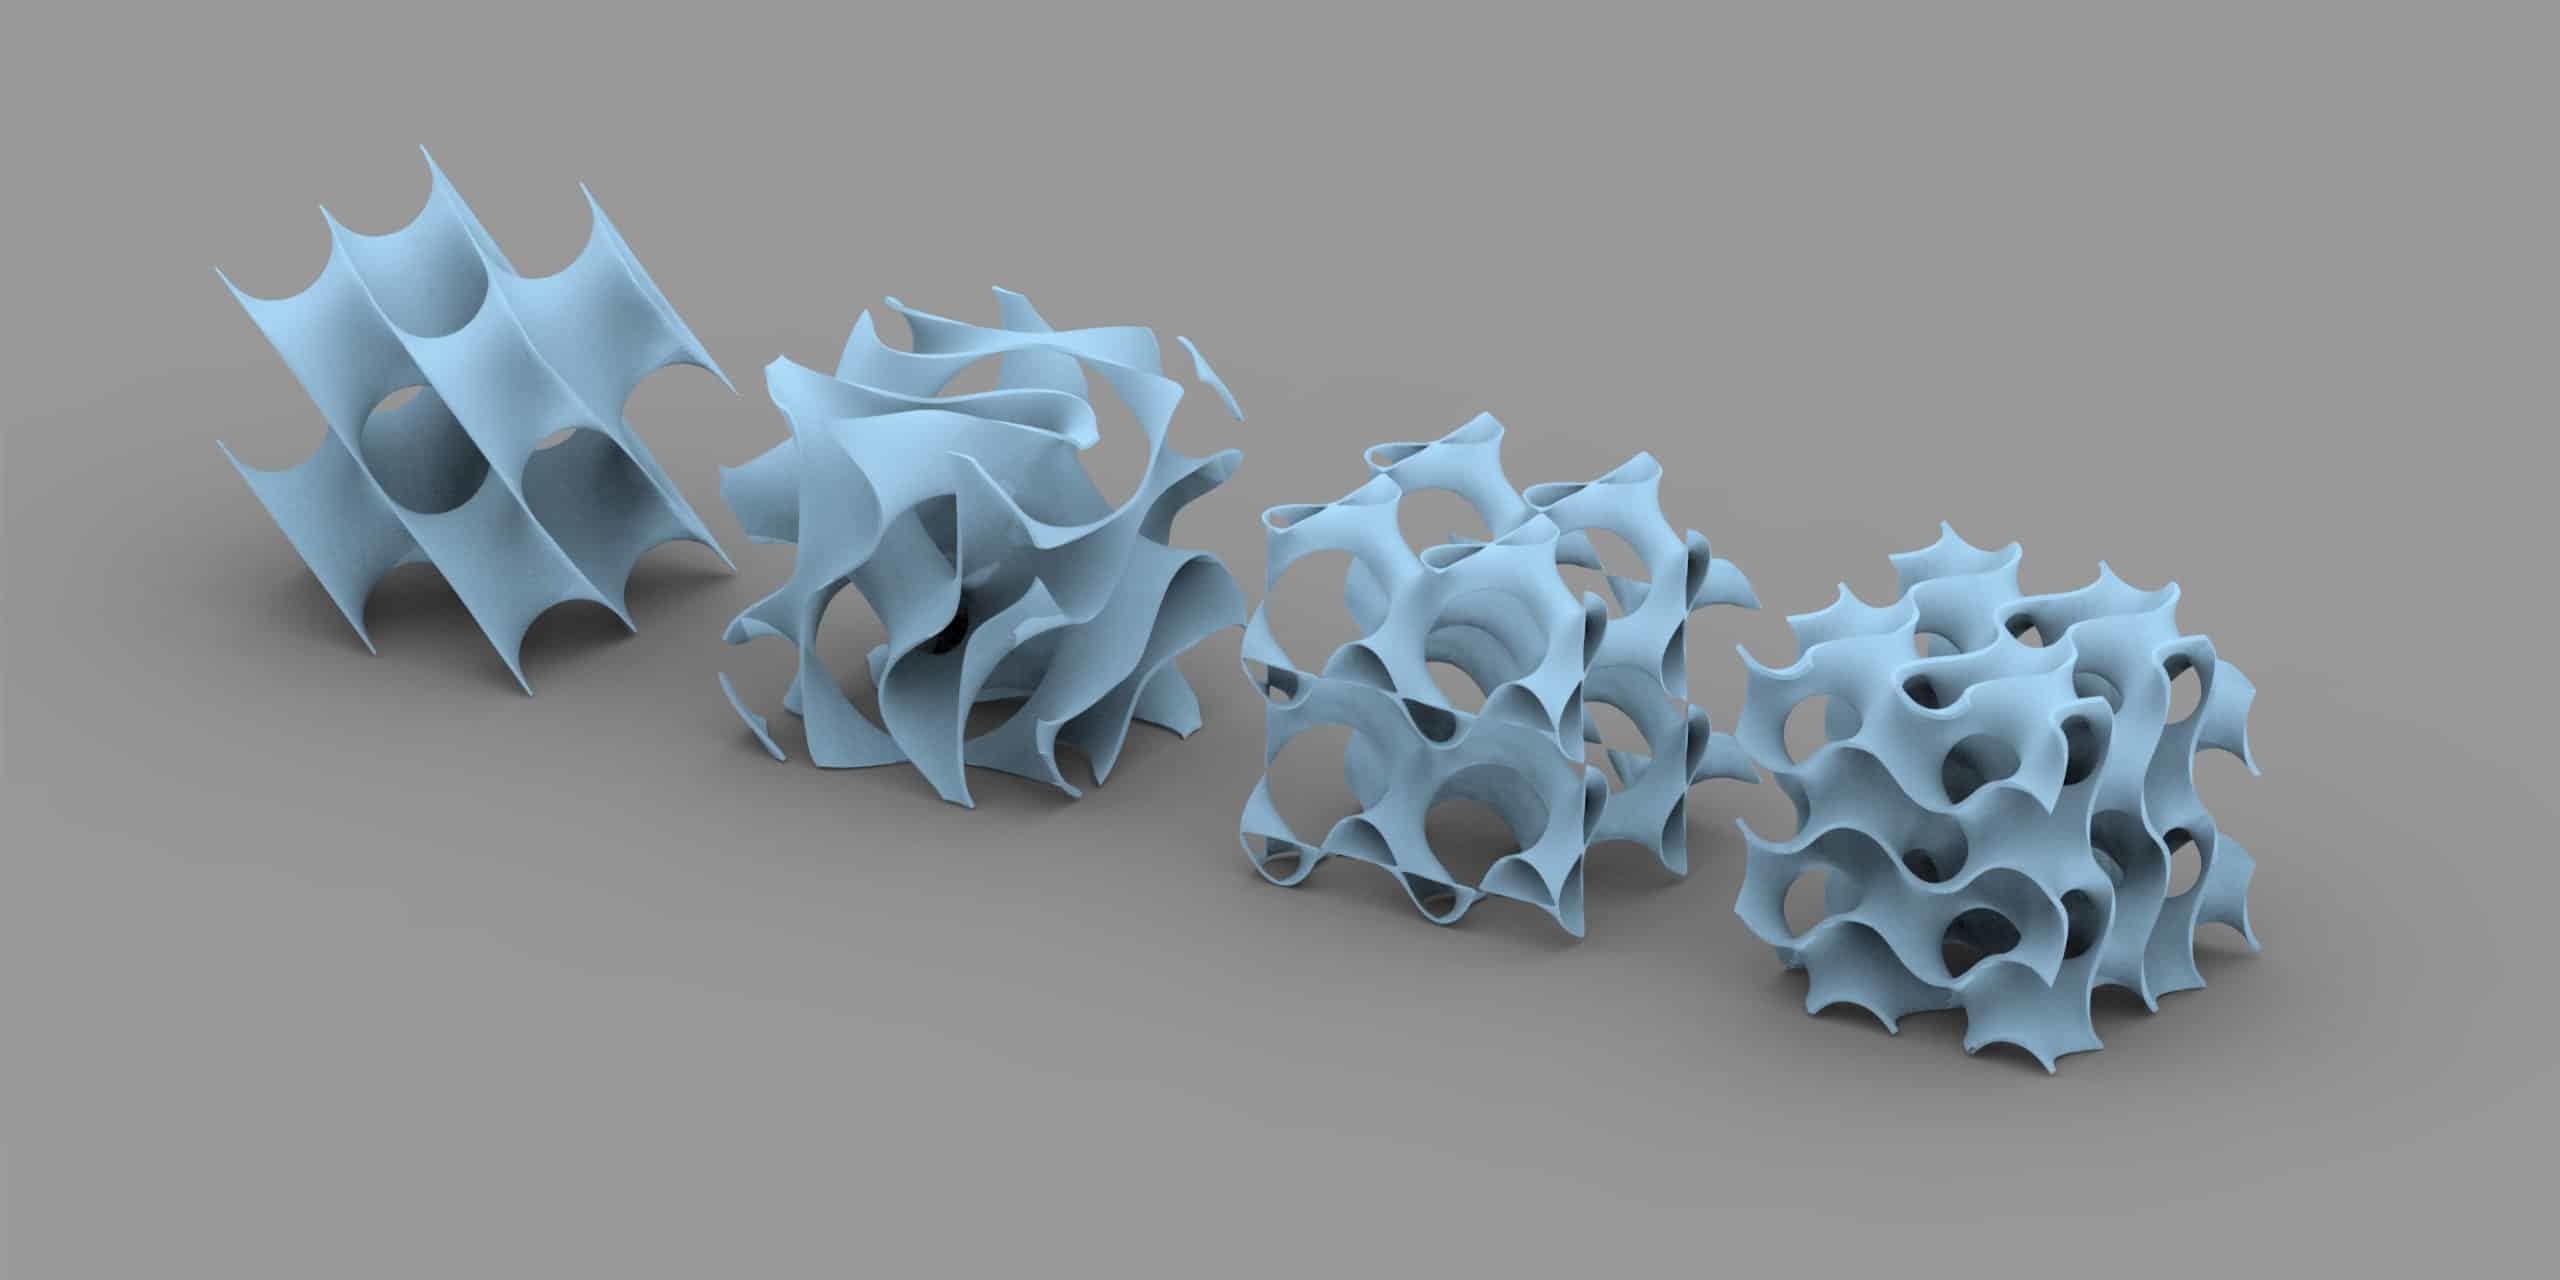
The lattice structures play an essential role in balancing speed, the print’s strength, and the surface’s quality. Lattice structures also have the benefit of being isotropic, so their strength is the same from all directions. For that reason, lattice structures are always the weapon of choice as soon as the part has some sort of functionality.
What is infill in 3D printing
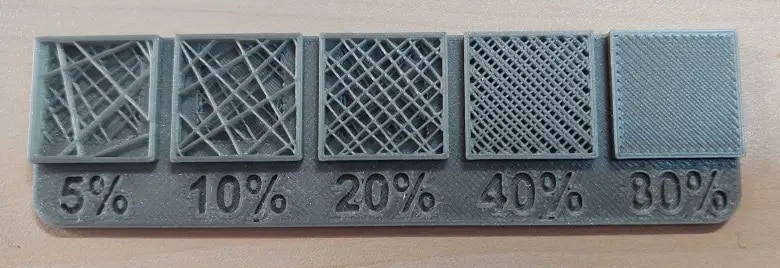
Infill density means the extent of “fullness” of the inside of an object. This is usually defined as a percentage between 0 and 100, where 0% means the object is hollow and 100%, means that it is completely solid.
The 3D printing infill percentage significantly impacts the object’s weight: The higher the infill percentage, the fuller the interior of an object, and the heavier it is.
Besides weight, strength, print time, material consumption, and buoyancy are also influenced by infill density.

How much infill should I use
Our ground philosophy is that you shall aim to print with the minimum infill percentage that still provides a print satisfying the needs. There is no point in printing heavy objects with high material usage and long printing time when the print is needed only to represent a prototype.
- For “standard” prints that don’t need to be specifically strong, we suggest using 10-20% infill density. This percentage keeps print time low, conserves material, and gives good enough strength.
- For functional prints that need to be strong, we recommend using a higher infill: from 20-30%. Although you can expect a longer printing time and higher filament consumption, you will get a stronger and heavier part. For most lattice structures, densities above 35% do not provide much additional strength.
- For small model prints, that are mainly for display purposes only, we suggest using an infill density of around 10%. This will result in a quick print and low filament usage, and a lightweight and not very strong print.
- For objects printed with soft materials, any infill density can be used. The higher the infill percentage, the less flexible the part will be.
So, how can I define the 3D print infill percentage for my project?
As a good thumb rule, we suggest you to start at the recommended 15% and then increase or decrease by 5% until you are satisfied with the print.
Related article: How to make a Benchy float
Read this article on Create it REAL website, it opens in a new window.
What are the types of 3D printing infill patterns
In REALvision Pro you can choose from 13 different types of infill. The different types have different characteristics, which you need to consider when choosing the infill type for your print. They are very easy to use in REALvision Pro and all are described, to help you to choose the one that fits your needs. In this section, I will give you an overview of these and some guidance about when each type should be used.

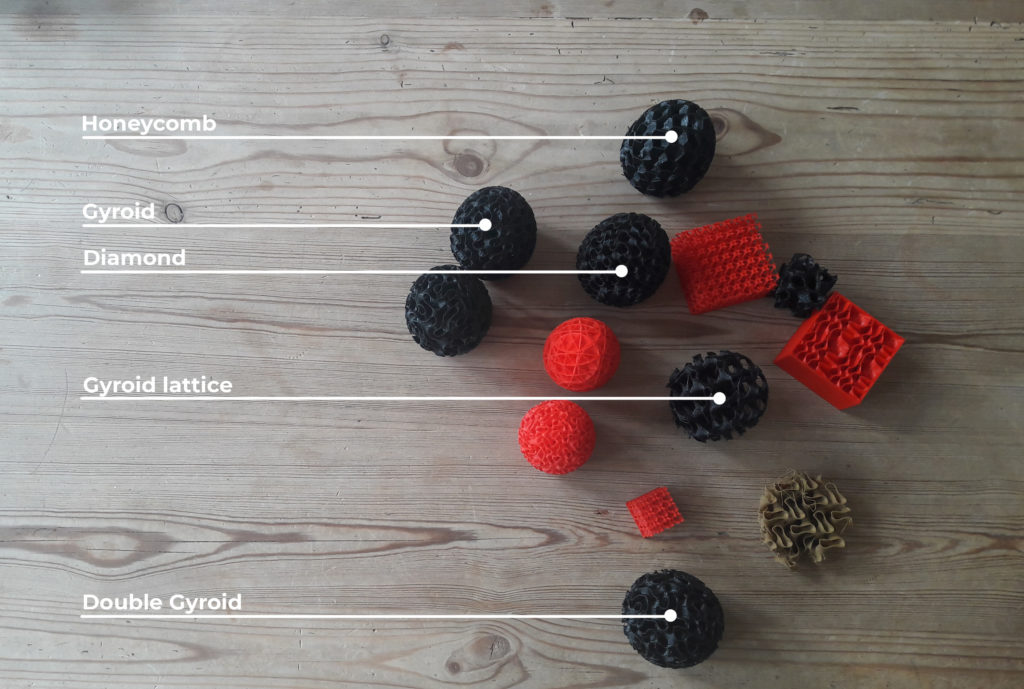
3D Diamond infill
- Evens out mechanical strength on all directions (isometric)
- Reduces print time by up to 10% for infill densities smaller than 15% (compared to crossed diagonals (described later) at the same density)
- Reduces object weight and material use
- Surface area and channel connectivity properties can be used for a variety of applications: from tissue scaffolds, biofilters, metamaterialsfor thermal and sound insulation or photonic manipulation
When to choose this infill type?
This infill type should be chosen for low-density prints. Where low weight is needed, as most of the part will be empty.
3D Double Gyroid infill
- Evens out mechanical strength on all directions
- Large surface area
- Surface area and channel connectivity properties can be used for a variety of applications: from tissue scaffolds, biofilters, metamaterials for thermal and sound insulation or photonic manipulation
When to choose this infill type?This infill type should be chosen where for example quick heat or sound transfer inside part should be possible.
Interlocking infill: better load distribution and durability with ADDCAAM™ plugin
InterLocking InFill strengthens internal structures by alternating infill paths in every other layer. This sandwich infill layers within structural walls, locking them into place and creating a more monolithic, cohesive part.
When combined with InterLace, this technique:
- Enhances part strength and durability
- Improves load distribution
- Optimizes material use
3D Gyroid Lattice infill
This structure optimizes object strength for stress in all directions. This keeps the object weight minimal and printing speed high. It is the most optimal combination of printing speed and quality. That is why it is also the most commonly used type.
When to choose this infill type?
This infill type should be chosen for quick prints with good mechanical properties.
3D Gyroid Skeleton infill
- Evens out mechanical strength on all directions
- Reduces object weight and material use
- Surface area and channel connectivity properties can be used for a variety of applications: from tissue scaffolds, biofilters, metamaterials for thermal and sound insulation or photonic manipulation
When to choose this infill type?
This infill type should be chosen when reducing material is a priority.
3D Isomax infill
This structure optimizes object toughness and crush resistance by using a structure that reaches the theoretical limits of elastic stiffness while also having a very low weight. It also evens out strength in all directions.
- Big increase of mechanical strength
- Evens out mechanical strength on all directions
When to choose this infill type?
This infill type should be chosen when the object` stiffness is important. (e.g. commonly used in medical products)
3D Honeycomb infill (Truncated octahedron infill)
A type of 3D honeycomb structure. Similar to the gyroid and the isomax, the truncated octahedron evens out mechanical strength in objects. The increased strength allows you to print parts with big structures with good mechanical properties.
When to choose this infill type?
This infill type should be chosen when you want to achieve strong and rigid prints, even in big, solid dimensions.
Linear and Crossed infill
They are the old-school infill type. They are simple, but not isotropic, so the strength of the printed part is not equal from all sides. These infill types are not used any longer, except if you need to print with infill densities above 50% in order to achieve the desired weight of the part.
When to choose this infill type?
These infill types should be chosen when a very high density is needed.
Honeycomb and Triangular infill
They are 2D versions of 3D honeycomb and 3D isomax. They try to improve the mechanical properties of the part but because they are not isotropic, you can’t really rely on them, as they only provide support in certain directions.
When to choose this infill type?
These infill types should be chosen for high mechanical resistance – for stiffness.
Fish, Moroccan star and Octagonal infill
These infills are not for any specific reason, they are visually appealing, and they were just created for fun.
When to choose this infill type?
These infill types should be chosen for high mechanical resistance – for stiffness.
What did we learn about infill
In conclusion, to save time, material, and money you need to consider the types of infills and their characteristics in relation to your expectations from your 3D printed part. I hope that after reading this article you have a much clearer idea of what are the available options for infills and what do each type can offer.
Related article: 3D printing, Sound and Art
Read this article on Create it REAL website, it opens in a new window.
Did you know?
FDM printing comes from the abbreviation Fused Deposition Modeling and it is also known as Fused Filament Deposition (FFD) technology, and as Fused Filament Fabrication (FFF). The spool of filament is the material used to build the 3D part by melting the plastic out of the nozzle of the 3D printer. All 3D printing filament starts out in pellet form – small granules of plastic. The filaments can be made of different types of plastic. The most commonly used plastics are PLA which is Polylactic Acid and ABS which stands for Acrylonitrile Butadiene Styrene. Both materials have favorable mechanical properties, ABS is well known for its impact resistance, toughness, and rigidity, and is also commonly used in injection molding besides additive manufacturing. PLA is known for its low melting point, high strength, low thermal expansion, good layer adhesion, and high heat resistance. It has also become a popular material due to it being economically produced from renewable resources (bioplastics).
The printer extrudes this filament line by line, layer by layer, by increasing the z-axis, and will build the 3D printed part.
A software program to fit your needs
If you want to get quality prints without doing 3D modeling, consider adding REALvision Pro to your 3D printer kit. We promise you easy-to-use 3D slicing software in the high-end printing industry. Suppose you are:
- A picky hobbyist with a cheap desktop 3D printer.
- Running a 3D printing service with flawless 3D prints.
- 3D printing metal parts for aerospace.
- 3D printing customizable prosthetics, implants, or casts in ABS plastic (Acrylonitrile Butadiene Styrene).
- Rapid prototyping 3D models from design software.
- Need help with calibration or material profiles.
- Finding the best 3D printer for your application.
- Exploring manufacturing processes and technology to obtain zero-waste.
In that case, we have a software plan fitting your needs.
